Article Overview
Installing horizontal cable trays involves careful planning, proper support, precise alignment, and secure cable placement to ensure safety and compliance with electrical codes.
Step 1: Plan the Route
Before any installation, map out the cable tray route based on your electrical design and site layout. Consider clearance, load capacity, and separation requirements for power and data cables. Identify locations for bends, tees, and elevation changes, and ensure the pathway is free of obstructions like pipes or HVAC ducts .
Step 2: Select the Right Tray Type and Size
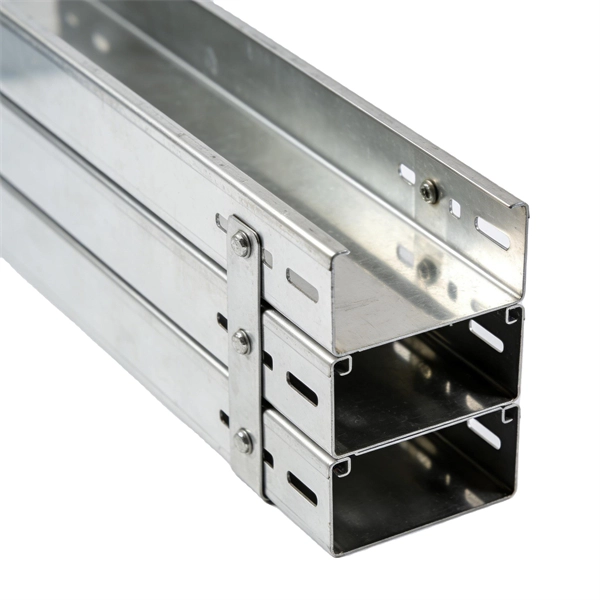
Choose a tray type suitable for your application: ladder trays for airflow and heavy cables, perforated trays for lighter loads, or solid-bottom trays for protection. Calculate the tray width and depth based on the number and type of cables, ensuring proper spacing to prevent overheating .
Step 3: Mark Support Points
Use a chalk line or laser level to mark the tray path on walls or ceilings. Mark support points at standard intervals, typically 1.5 to 3 meters, depending on tray type and load. Ensure support locations accommodate bends, tees, and risers .
Step 4: Install Supports
Secure mounting brackets, wall arms, or ceiling struts at the marked points. Use threaded rods, anchor bolts, or other hardware appropriate for the surface. Properly spaced supports prevent sagging and maintain structural integrity .
Step 5: Assemble and Align Trays
Connect tray sections using splice plates or couplers, ensuring trays are level, straight, and aligned. For long runs, consider using a cable tray roller to facilitate smooth cable placement. Handle materials carefully to avoid coating damage .
Step 6: Pull and Secure Cables
Load heavier power cables first, followed by lighter control or data cables. Use dividers if running mixed cables to prevent interference. Secure cables with ties every few meters to maintain organization and allow heat dissipation. Ensure proper grounding and bonding according to electrical codes .
Step 7: Final Checks
Inspect the installation for alignment, secure connections, and compliance with local electrical codes. Verify that supports are stable, cables are properly separated, and grounding is continuous. Make adjustments as needed before energizing the system . Following these steps ensures a safe, organized, and durable horizontal cable tray installation suitable for industrial or commercial environments. Proper planning, support, and cable management are critical for long-term reliability and maintenance efficiency.
Cable Support Distances
It is not realistic to install cables in a flexible system without any initial off-set (typically 2%). If no offset is introduced, in the form of a
Eaton
Eaton
How to create vertical cable tray in Revit
How to create a vertical cable tray in Revit to match the one shown in the image: This can be done with the free Revit
Cable Tray Systems: A Complete Guide to Types & Installation
Discover the essential guide to cable tray systems. Learn about ladder, trough, and wire mesh types, key
5 Steps to Learn How to Install Cable Trays
Installing a cable tray system requires careful planning to ensure it can support the weight of the cables and adheres
INSTALLATIONS
Use this guide to learn the most effective installation practices when installing Cablofil tray. Each example of bends and tee''s clearly
Innovative, Flexible, Field-Configurable Wire Basket Tray Solutions
Cable tray must be installed in accordance with the NEC ® and CE Code, and must be properly bonded per NEC section 250.96 and
INSTALLATION GUIDE
Center hung tray supports allow for quicker and easier cable installation by allowing cables to be deposited into tray systems from
Cable Tray Installation Method Statement
Cable Tray Installation General Requirements Approved site fabricated trays shall be used as per site
Mastering Cable Tray Installation | Step-by-Step Guide for a Seamless
Whether you''re building a commercial setup or upgrading an industrial plant, proper cable tray installation ensures
Method Statement installation of Cable Trays and Ladders
This method statement covers the site installation of the cable tray & ladders and the requirements of checks to be
Cable Tray Fill Rules (NEC 392)
Cable Tray Fill and Installation per NEC 392 Cable tray types, fill rules for single-conductor and multiconductor
CABLE TRAY SYSTEMS GUIDE
Cable Tray Systems Guide HUBBELL Hubbell Wiring Device-Kellems and Hubbell Premise Wiring are divisions of Hubbell
Cable Tray Installation Rules (NEC 392) – Electrical Trader
Core rules for selecting, installing, grounding, and filling cable trays—clearances, materials,
Best practice guide to cable ladder and cable tray systems
Cable ladder and cable tray systems The following recommendations are intended to be a practical guide to ensure
Best Practice Guide to Cable Ladder and Cable Tray Systems
Introduction This publication is intended as a practical guide for the proper and safe* installation of cable ladder systems, cable tray
SWIFTS CABLE TRAY
Swifts® cable tray the quick fi t choice tal fl exibility. Available in four types, this strong, durable system has been designed with fast-fi

Cable Tray Type Selection
If cable trays are being installed where working space is a problem, hand access through the cable tray bottom may help to facilitate
INSTALLATION GUIDE
To ensure that the complete ladder tray wiring system performs as designed, it is important that it is properly installed. Personal
Modeling cable tray horizontally
Modeling cable tray horizontally Model a cable tray horizontally on a wall in Revit - Exercise Open the Small Medical Center-Cable
Cable Tray Technical Guide A practical guide to product selection and
Cable Tray Technical Guide A practical guide to product selection and installation This guide for engineers and installers has been
Flexible horizontal adjustble splice plate instructions
Series 2~5 Aluminum Cable Tray The flexible horizontal adjustable splice plates are designed to allow for horizontal direction
Cable Tray Systems
Aluminum Channel Horizontal Elbows 30° Channel cable tray secures cables using Eagle Basket pre
NEMA VE2 Cable Tray Installation
Home » Literature » NEMA VE2 Cable Tray Installation NEMA VE2 Cable Tray Installation NEMA VE2 NEMA stands for the National
A Guide to Installing and Supporting Electrical Cable Trays
This guide covers the critical steps, from selecting the right electrical cable tray and performing accurate
NEC Article 392 Guide: Ensuring Compliance for Cable
The primary rulebook used in the safe use of cable trays is NEC Article 392. This is a
Cable tray clearances | Information by Electrical Professionals for
The minimum clearances for cable trays shall be (a) 150 mm vertical clearance, excluding depth of cable trays,
B-Line series Cable Tray Design Considerations
Is your cable tray system optimized for safety, dependability, space and cost savings? Cable tray (or cable ladder) systems are a
7 Types of Cable Trays: How to Choose the Right One
Cable tray systems are engineered support structures designed to route, support, and protect insulated electrical
Cable Tray Spacing Standards for Installation and Safety
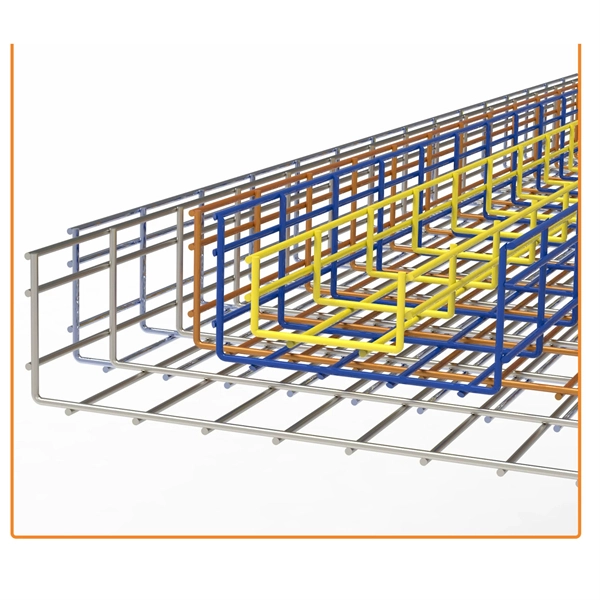
Key Factors Impacting Cable Tray Spacing Understanding cable tray spacing is key to
Related Resources
- List of Distribution Box Protection Switch Models
- Price of Chad 670nm laser diode
- Moxa Industrial Ring Network Core Switch
- Rainproof cover for distribution box
- Cable Tray Wiring Patterns
- How to wire a high-voltage power distribution box on a construction site
- Earthquake-resistant stainless steel cable trays
- Composition of Protective Distribution Box
- Inquire about CFP22 5G
- Brazilian Construction Distribution Box Customization Company
- The distribution box cannot be grounded
- How is return loss generated in optical modules
- ST1 Interface
- Low-voltage busbar internal components
- Cable and Optical Cable Laying
- How to reserve space for electrical distribution boxes
- Huijue Fiber Optic Cable Manufacturer
- Monitoring Fiber Optic Patch Cord Parameters
- Telecommunications Distribution Box Dimensions and Specifications Table
- Parameters of Steel Cable Trays
- Smart City-Grade Linear Drive Pluggable Optical QSFP Selection Guide
- Applications of 7550 cable trays
- Fiber optic patch cords can be run through 20mm conduits
- What bill of quantities and quotas should be used for cable trays
- Malta Inquiry High-Speed Optical Connection 40G
- Fiber optic splice box to network cable conversion
- Customs declaration for 400G SD-WAN device
- Industrial-grade switches with wide temperature range